Sunday, 4 June 2017

Week thirteen: 
Ferrari forming almost complete 

I headed to class early to continue on from last week as it's much easier when 20 other people aren't there. It seems that some people spend all day in there which is not possible for my circumstances. None the less, I worked for half an hour then one guy closed the lab for some reason (I presumed he probably wanted lunch) until 1:30. In that half an hour I basically achieved the shape that I wanted with my three metal pieces.


  • This session I really focussed on work hardening the pieces further and getting the minute stresses in place to hold the final shape. This was done through a high series of passes with a low pressure applied. I really didn't want to undo my previous hard work but at the same time there wasn't too much to actually do. As you can see in the photos, I managed to achieve the slight variation in angle for the centre piece as it was slightly raised. For the windscreen, the shape needed the most work from week eleven. I decided to get the fold along the centre perfect before folding the edges. This is not just a roll of the edges, it's more of a staggered taper true to the desired structure, and also providing additional strength. Also evident is the upward curve for both the top and bottom parts, working in different planes with conflicting stresses, shown in the sketch below.
  • Just on working on the windscreen, as the edges were turned over a bulge began to form at the corner of the centre crease which then needed to be flattened out again. At this stage, I had to leave as the workshop was closed but I was pretty happy with how the work pieces had turned out overall.
  • I managed to take a couple of files (flat and round) and sandpaper into the 24 hour space to file and smooth out the rough edges and sharp corners. It was surprising to see that the places where I trimmed with the tin snips had seemingly micro sized metal shards sticking out which was extremely hazardous. Using the rough file I got rid of these and then using a less coarse file put a slight round on the edges so they could be handled safely. Daniel told me that we weren't in fact handing in these work pieces to be marked, that it again was an online submission, so this might not have been completely necessary, however is something I've always done out of good habit, and also to make carrying the metal home easier. The sandpaper was used for finishing off the work piece.
  • As you can see from the above photo, the edges were slightly rough and uneven. However the metal had a real shine and gleam to it which was nice to see. Other groups were sanding the entire surface which in my opinion ruined the metal, giving it an almost frosted look. Not only should the surface not needed to be sanded (in my opinion) as it should be completely smooth, the end result looked rough, with large pitted areas, drawing attention to the imperfections.
  • Only one of my group mates was there during the lesson working on his bonnet piece as you can see. I'm really happy especially with the joints, to get such a close fit together was a big accomplishment for me and was the result of accurate measurement and trial and error (mostly the latter). My group mates work was fairly rough but you can get the idea of how it fits together, it's quite hard when the group have other major assignments to do and you're the only one there every lesson. 
  • Once laying the windscreen over the waffle frame, I realised there was the slightest of recesses where the glass would sit, so I amended this with the nylon mallet and the sand bag.

Working towards next lesson and the hand in: I decided to take the work home to reduce the risk of it getting stolen/damaged and to polish the metal to really pop. Next class we will take a photo of the finished product, a half complete Ferrari (due to our small group). Whilst finished structurally, I have a small idea to really make the work piece complete. Stay tuned regarding this.

Thursday, 25 May 2017

Week twelve: 
Ferrari forming underway 

Now that I had made a start the previous week, it was business as usual. The other three group members all had major assessments due this week so I was left by myself to work on the project, which worked out rather well. Since I had made considerable progress last week on the first two panels, I decided to start the third.
  • I began again by running the metal through the English Wheel along the shorter width to get a subtle curve. I generally start with a fairly high pressure to form the shape and then work backwards if necessary. I also combine this with the nylon mallet and the sand bag to fix the edges up. The tail of the Ferrari peaks up along this curve, similar to the torus, and therefore needed to be bent to try and get the correct curve for upper part. This was a rough bend to get the process started. I'm finding that due to the methodology I've applied in my approach, I'm able to use the English Wheel for 90% of the forming. As you can see in the first image below, I used the wheels to lock the tail in, and using my hands, manually manoeuvred the correct angles. I found this to be the easiest method working with an already curved surface. As I continued, I routinely trimmed the metal to ensure the shape was in accordance with the MDF sectioned model. In the second photo you can see stresses forming in the bottom and top corners. This was a result of the pointed end of the nylon mallet and some aggressive striking into the sandbag. As the metal curves out, it also curves down towards the edge before peaking back up. I had a bit of trouble perfecting this shape as the metal really wanted to deform in the wrong places, however perseverance and patience got me there in the end.
  • As you can see, I achieved the correct shape and the panel is 90% complete. I ended up taping it in place to help align with the other components, and because people kept moving around the table knocking things. Things to be worked on for this part to be completed include: file and sand the ends to remove any burrs, straighten up the bottom edge to achieve a perfect bend, hammer out the pits and imperfections right at the end, and a final sand and polish.

Seeing as I was fairly happy with the overall shape and dimensions of the bottom piece, I quickly moved onto the next connecting piece. It's weird making progress in the class and not being behind, some groups still hadn't finished the MDF model..
  • This is what I was working from the previous week. It's hard to tell from the photo as the image is solid, however the metal is curved in three planes. It also might look easy as it's seemingly flat, however this probably took the longest amount of time due to the fact that there's no rigid shape to hold form, so every movement shifts every other angle of metal. Talk about frustrating.
  • In the photo bottom left, the way the light hits the metal partially hides the very exact curves present. I was a tad lost figuring out how to achieve the bend in the middle without losing the curve I finally managed to create. A few times I attempted it on the English Wheel and actually lost the shape and had to re-start, however the process of working the metal gave it greater malleability which I believe helped in the end. Similar to the previous process above, I rolled the metal half way, stopped, then maintaining the curve with my hands bent the bottom down. Repeat this process for the length of the piece and was able to achieve the downward bend of the roof peak. You can also see the the bottom edge of this component is slightly raised and will be fixed next week. In addition to this, the edges need to be smoothed as well, along with a general sand and polish. The shell of the roof is really starting to take shape.

From the previous week, I would say the front windscreen was almost done. The top section was slightly raised and the edges weren't curved enough, but overall I had achieved the desired shape.
  • By the time I was up to the front piece basically all my tools had been taken from other students which really slowed the process down. I also had to contend with people constantly changing the English Wheel rollers and more people in the work room (as the deadline gets closer). I managed to get on and start working the shape again. Originally I lost the uniform curves I had by attempting to tuck the centre edge down, due to the fact it's holding the force in the bend so any movement will pull the metal back into alignment. I eventually got it back with a lot of rolling and hand forming.
  • Similar to the last piece, it needed additional bending to lessen the angle, which I started with the English Wheel and by hand. At this point another group which looked to have about 10 members came to my work bench and just stood in the way so I gave up for the day. The below photos show the overall progress that was made. It's clear that the windscreen piece needs a little bit more work and a few angles are off, however I was happy with the shape and the overall progress I made. I ended up leaving the pieces taped up on there so I don't have to carry them and risk squashing them. Also might help my group members see my progress whenever they start.

The way this assignment is structured, the projects all look fairly similar. One thing I've noticed and a few people have mentioned it to me as well, I seem to be the only person who has divided the section up. Everyone has opted to try and shape the whole roof section in one piece. Granted there will be no joins, to do this would be extremely difficult and wouldn't achieve the same result.
  • Due to the fact I started late, I didn't have enough time to work with the roof as one piece. (Before extension was given). 
  • Another group who have already had an additional couple of weeks chose this method for the roof, and even with all that extra time the curves aren't as evenly shaped, the folds aren't straight and the metal has a real rough, uneven surface texture. 
  • When I chose this piece I made the decision it would be silly to do it in one piece as there are too many different angles and curves and folds to create one perfect component. This would also limit my ability to use the English Wheel, hence eliminating the tool to get the best result. When everyone is using the hammers I get more time on the wheel, so win win. Also the metal wasn't large enough, which is the main determining factor.
  • I took the photos below of another group's roof component. I'm not sure who this belongs to or how long they've spent on it, and although it's early stages you can see the issues I've raised which reinforces my selection method. Regardless of how much they work that piece, it will never be perfect as there are too many conflicting forces acting against each other. And for this classic Ferrari, it deserves to have a smooth, contoured surface.

Just as a side note: When modern cars are made, well those that are metal and not some cheap form of plastic crap, they're normally done by means of pressed metal, as the video below shows. This is the most accurate way of achieving perfection as the male and female moulds and generally a hydraulic press leave no room for any variation. This is not to say that car bodies aren't made by hand forming any more. The second video below shows just that. However it's worth noting that the pieces they make don't have multiple conflicting angles and curves. You won't see a whole roof panel made in one go, besides the point that it wouldn't have enough strength without joints, it's not a practical shape. So I carried that methodology into my metal forming and hopefully it will pay off the next two weeks to produce an outstanding product.


Thursday, 18 May 2017

Week eleven: 
Beginning stages of forming the Ferrari

By the time I came to class, I was the only person there. So I grabbed the model and some metal and began the process.
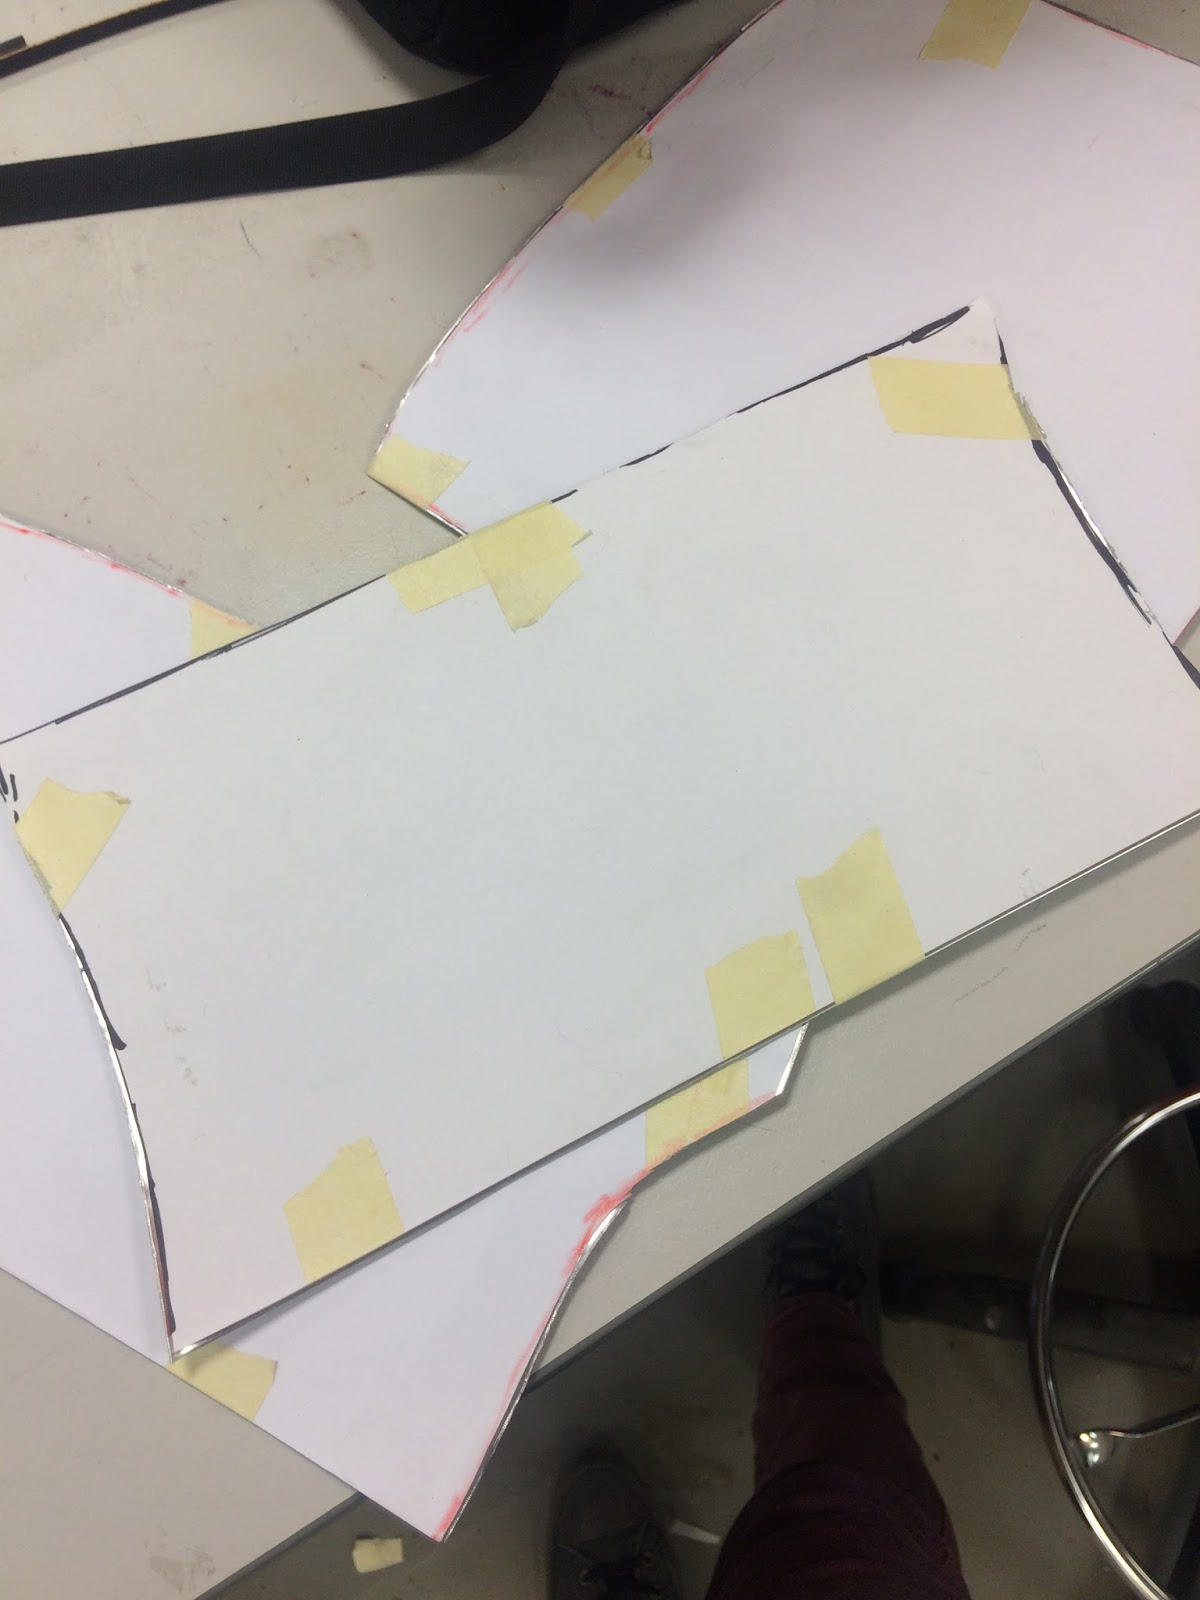
  • Using some paper, I traced out the shape of my sections. Because my part is so large, it wouldn't fit on one so I had to divide the shape equally. I made the choice to do the back in three parts to make the curves and bends more manageable, as Russell said it didn't have to be made in one piece, which was lucky because the metal wasn't large enough to do so anyway. The windscreen would rise over to the crest of the roof and then join the downward slope to the trough of the roof. This would then join the tail of the car as it rises up for aerodynamics. To do all of this in such a large shape would be extremely tricky, it would simulate the torus but with curves in three planes. My methodology would also suit my style of metal shaping which will be covered later.
  • Now that the shape was traced onto paper, I cut them out and taped them to the aluminium. I did this in such a way as to leave enough material in the sheet as a useable off cut for my other team member doing the side panel.
  • The pieces then had to be cut out, and it was difficult to find a pair of sharp tin snips. As mentioned in my previous post, I have an ongoing problem with a strained tendon in my thumb of my main hand, so this was extremely difficult. Pushed though and I had completed the metal shapes ready for forming.
The first piece I started was the centre piece, seen below, as this seemed the easiest. The workshop was very busy and tools were really limited, so I tried to think outside the box. Using the cylindrical timber piece I stretched the metal to get a subtle curve. The outside wings curve down even more so I had to wait for the long cylindrical cast iron mould to get a uniform bend. They were the main curves on this piece. The next step in the process was long and arduous and involved using the english wheel to smooth and slightly shape. As the model was in the next room I had to constantly move back and forth, so to eliminate the time I did a lot of the bending with my hands and random things in the 24 hour workroom, such as chairs and tables. The main trouble was getting the piece to sit exactly in the right place and flat on the model, as every bend in one direction would shift in another direction, something worse in flatter designs as they aren't as rigid.

  • I was fairly happy with the first piece, and although not complete, will come back to it later. I was a bit concerned about finishing on time as this was before Russell had given the extension.

Now that I had made a good start, the next step was to create the front windscreen component. This had a large bend in the middle of the y axis, a subtle curve along the x axis, and a strong bend at the end of each x axis. This last bend is in conflict with the bend in the y axis which posed the greatest problem. As you can see in the photos, I begin with a very rough shape formation with the nylon mallet and the sand bag, very rough. I then use the English Wheel to smooth the metal and get some uniformity in the piece. Personally, this allows me to better control the metal, using both hands to bend as the wheel flattens and smoothes, and achieve a more attractive finish product.


  • Within this segment, the large bend from the windscreen to roof was the easiest to form, yet the hardest to maintain. Every movement along the perpendicular axis seemingly pulled this back to flat. To save time making a mould, I repeated the process gradually and very slowly I started to see the shape I was looking for. As I aligned the piece, some edges were distorted and will require trimming, which is to be expected as parts shrink and expand after deformation.

The photos above are a representation of what I achieved from week eleven. The unformed metal on the bonnet in the last photo will be shaped to continue down the back of the car to the wing. As you can see, by working the metal in a uniform matter, a real gleam appears on the surface. I won't have time to continue till next week.

Week seven, eight, nine, ten:
Beginning of Ferrari Project

Turns out week seven (which was a faculty non-teaching week) had a class, and a really important class too. While I was at home relaxing thinking "boy it's nice to be ahead of the game", this then turned to frustration as the next week was mid-semester break and the following was no class due to ANZAC day. Having basically three weeks and a group would have been ideal to finalise the design.


Week nine:

Come week nine, there were ten people without groups, and somehow I ended up in a group of four. And while everyone was assembling their model, we were struggling to figure out the software issues with the discontinuation of 1234Make, not ideal. I had attempted this in my break and Autodesk had suggested Fusion 360, however this program would not open the provided file so I gave up. By the end of class the Ferrari has been split using the Splitter software and we were 90% of the way to being ready to laser cut. The program dissects the model, however there are issues with where the model is cut and random skewed lines which would cause problems during the cutting, so these needed to be cleaned up. One of the guys in the group volunteered to do this over the next week, and due to the busy schedule there were no time slots available to laser cut. Small example below.


Week ten:
Ready to go, while everyone was forming their metal, we had access to the laser cutting machines first up. Issues which arose:
  • One machine wasn't functioning 100%, wasn't cutting completely through which meant we had to do half the job with a blade. At one stage the machine basically only engraved the 3mm MDF, so we ran it through again to the same result. This caused the process to drag out massively.
  • The workshop ran out of the correct timber. Fitting as I've had the worst luck in this class, we were two sheets short. I went for a walk to local hardware stores which turned out to be closed down. We managed to scrounge up some 3mm plywood to just get the model done to assemble.
  • There were some issues in the design of the grooves, some weren't deep enough, had to do these by hand with a strained tendon in the thumb, just another day in the office.

In the image above you can see the laser cutter repeating the process.

Thankfully our group stayed back together and assembled the model. This took a while as we had significantly more waffles than other groups, a decision made to create a better design to shape to. We taped it up and divided it so we could start to work on it individually. Turns out we couldn't start because we didn't have the metal, so that would have to wait to next class. I have the largest part, from the windscreen all the way back to the rear of the car. It was done this way so that we could get the most model out of the fewest members.


The completed timber prototype ready for the metal to be formed. As you can see, it is made up of an incredibly detailed waffle, 23 long by 16 wide. The model itself is extremely large, right at the size limits of the laser cutter, with a hefty weight as well. Despite the complexity, the small increases in the slots for wiggle room meant that it was fairly easy to assemble, yet rigid and self supporting at the same time. We may have been the last group to form but I was very happy with our prototype.

Tuesday, 4 April 2017

Week six: Continuation of the tray and the blister

The tray:
  • As mentioned in the previous post, the first attempt at the tray was disastrous due to the fact they were made at two separate times by two different people, and was never going to be perfect. We decided to start again using a better timber jib and making a smaller tray with larger curves. In the two images below you can see both the jig and the measuring out of the steel to be cut and shaped. I repeated the same process as the first time however this time created two identical 'moulds', the main and the support to ensure the metal could only move in the direction we wanted it to. The metal was then wedged between the two pieces of MDF, clamped together and locked in the vice allowing the process to begin.

  • The edges were softly beaten into place to achieve a rough tray shape. When the time came to remove the jig the edges were so tight that the MDF wouldn't budge. As you can see I split the MDF to trim the crooked edges to no avail. In the end it was easier to drill a screw in and use that to leaver the wood out, with the help on pliers in the edges.

  • The result can be seen below. Bearing in mind the corner edges will be trimmed, sides flattened and smoothed down, the result is far better than the first attempt which is very pleasing. This will be completed the next meeting with my partner and will be photographed together to show uniformity.

The blister:
  • The blister task required the use of two female moulds to create a blistered shape in the metal, in this exercise the shape was to be a unique teardrop. Two moulds would be CNC cut with both the tear drop shape and four holes to allow for clamping later. I received tear drop 11 which was a long yet fairly straight shape, the hardest part would be creating tools to get into the tip of the mould. 
  • Once the shape was cut with the CNC machine, we had to use the jigsaw to cut the tabs and then using a file or router smooth the inside edge. The process went smoothly however the line to use the router was too long so I opted to file instead. To ensure the moulds were identical I bolted them together and using the cylindrical sander achieved two symmetrical components. Just goes to show there are multiple ways to achieved the desired result.
  • Now that I was ready to start, the metal was clamped inside the two pieces of MDF and bolted tightly. Then using the nylon hammers I began pushing and stretching the metal down at the larger end, ensuring to start at the top not just the centre.
  • Although the start didn't look too promising, I began to see some quality results during the process. This was a result of switching between different types and sizes of mallets, especially using wooden timber jigs to protect the metal surface. The cut-out shape was extremely handy in getting into the tight upper corner. Similarly, timber off cuts in the lab were found, sanded and rounded to achieve custom shapes for the metal blister.
  • Admittedly the process was slow, especially whilst taking care to not over stretch the metal, however the waviness and unevenness of the patterns began to smooth after a while, with the aid of the aforementioned timber custom jigs and the sand bags. Below are some photos of the blister as it currently stands. I trimmed the edges and rounded the corners for easier and safer transport. There are still some minor issues which are drastically exaggerated in the reflection of light but my limited time has meant I've been unable to make it to the labs very often. I will however find time to continue to smooth the interior out to get as close to perfection as possible.